
Creating a new Liberty Server
- Create a server using the Wizard.
Click File > New > Server
Click Next

-
Select WebSphere Application Server Liberty
Click Next

-
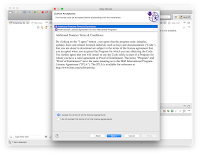
Select Install from an archive or repository
Click Next

-
Enter the Destination path (This will be the place where the server will live)
Select Download and install a new runtime environment from ibm.com
Select WAS Liberty V8.5.5.9 with Java EE 7 Full Support
Click Next

-
Click Install for the following bundles:
- Base Bundle
- Liberty Core Bundle
- V9 Bundle for Java EE 7 Full Support
- V9 Bundle for Java EE 7 Web Profile

-
Accept the terms
Click Next
-
Select Stand-alone server
Click Next

-
Enter a name for your server. I usually leave it as defaultServer
Click Finish

-
Finally a confirmation alert will show. Now we have our Liberty server installed in Eclipse. Almost ready :)


Adding a simple keyStore
Since we havejavaee-7.0 feature enabled we need to add a keystore, otherwise we will not get rid of the following error:We can do as the comments and create a properly encoded password but for development we can do just:The enabled features require that a keyStore element and a user registry are defined in the server configuration. Use the server configuration editor to add these items.

<keyStore id="defaultKeyStore" password="keyStorePwd"/>
0 comments:
Post a Comment